Store
The store of your instance is reachable at: https://xxx.prevision.io/store (xxx being the name of your instance)
It can host:
- Models trained in the STUDIO
- Python notebooks (More information: https://jupyter.org/)
- Packaged Dash applications (More information: https://plot.ly/products/dash/)
- Packaged Shiny applications (More information: https://shiny.rstudio.com/)
Each of these applications is protected by rights that were specified at the time of deployment. Thus, each end user only sees the applications to which he or she is entitled.

Each tile represents an application. The name and description displayed are the ones you entered when you created the application. To access it, simply click on the name of the application.
Accessing deployed content
Model
If you access a model, you will have the following interface:
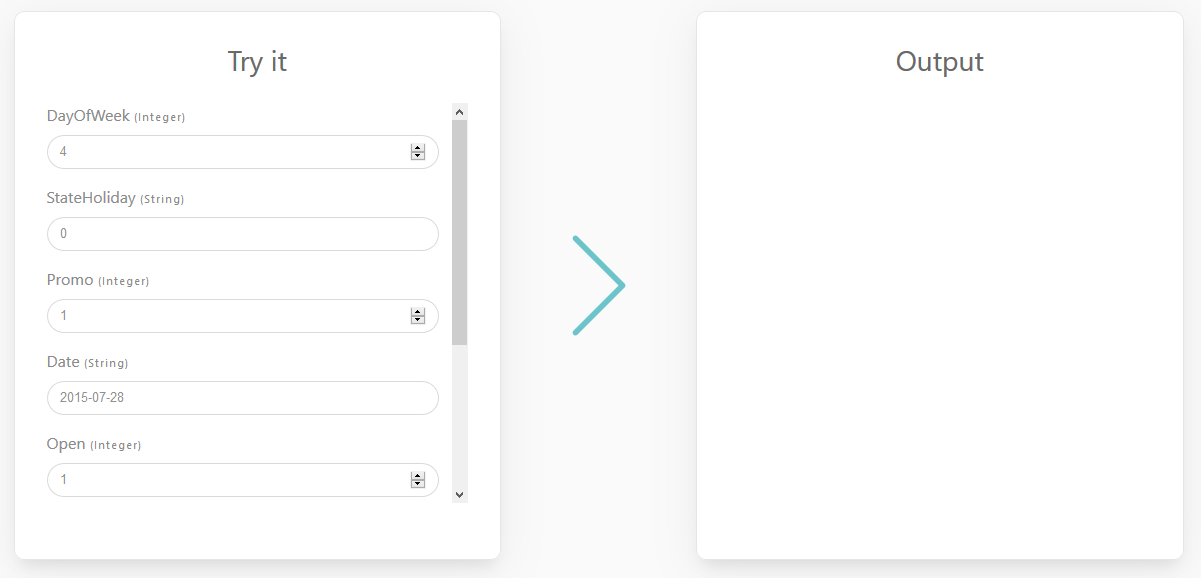
In the left part, you can select all the values of the features of your use case. Once you have chosen the values, you can start a prediction by clicking on the « Submit » button. The prediction will then be displayed on the right-hand side of the screen.

Packaged application
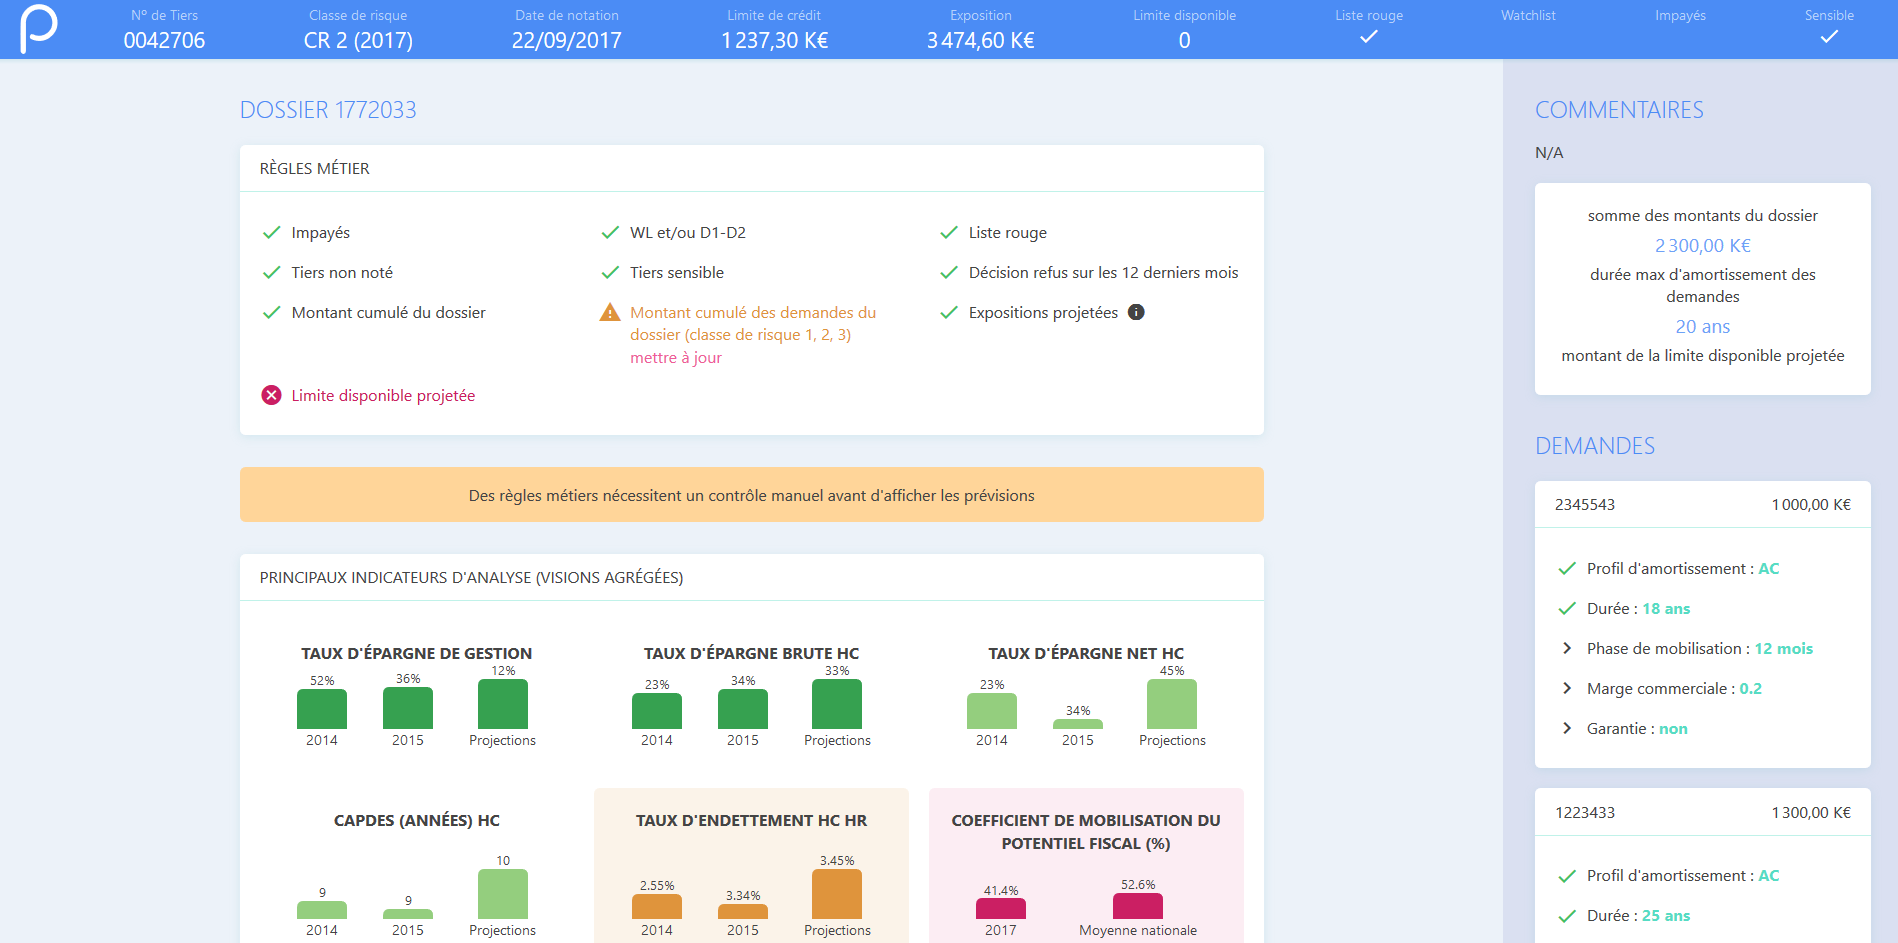
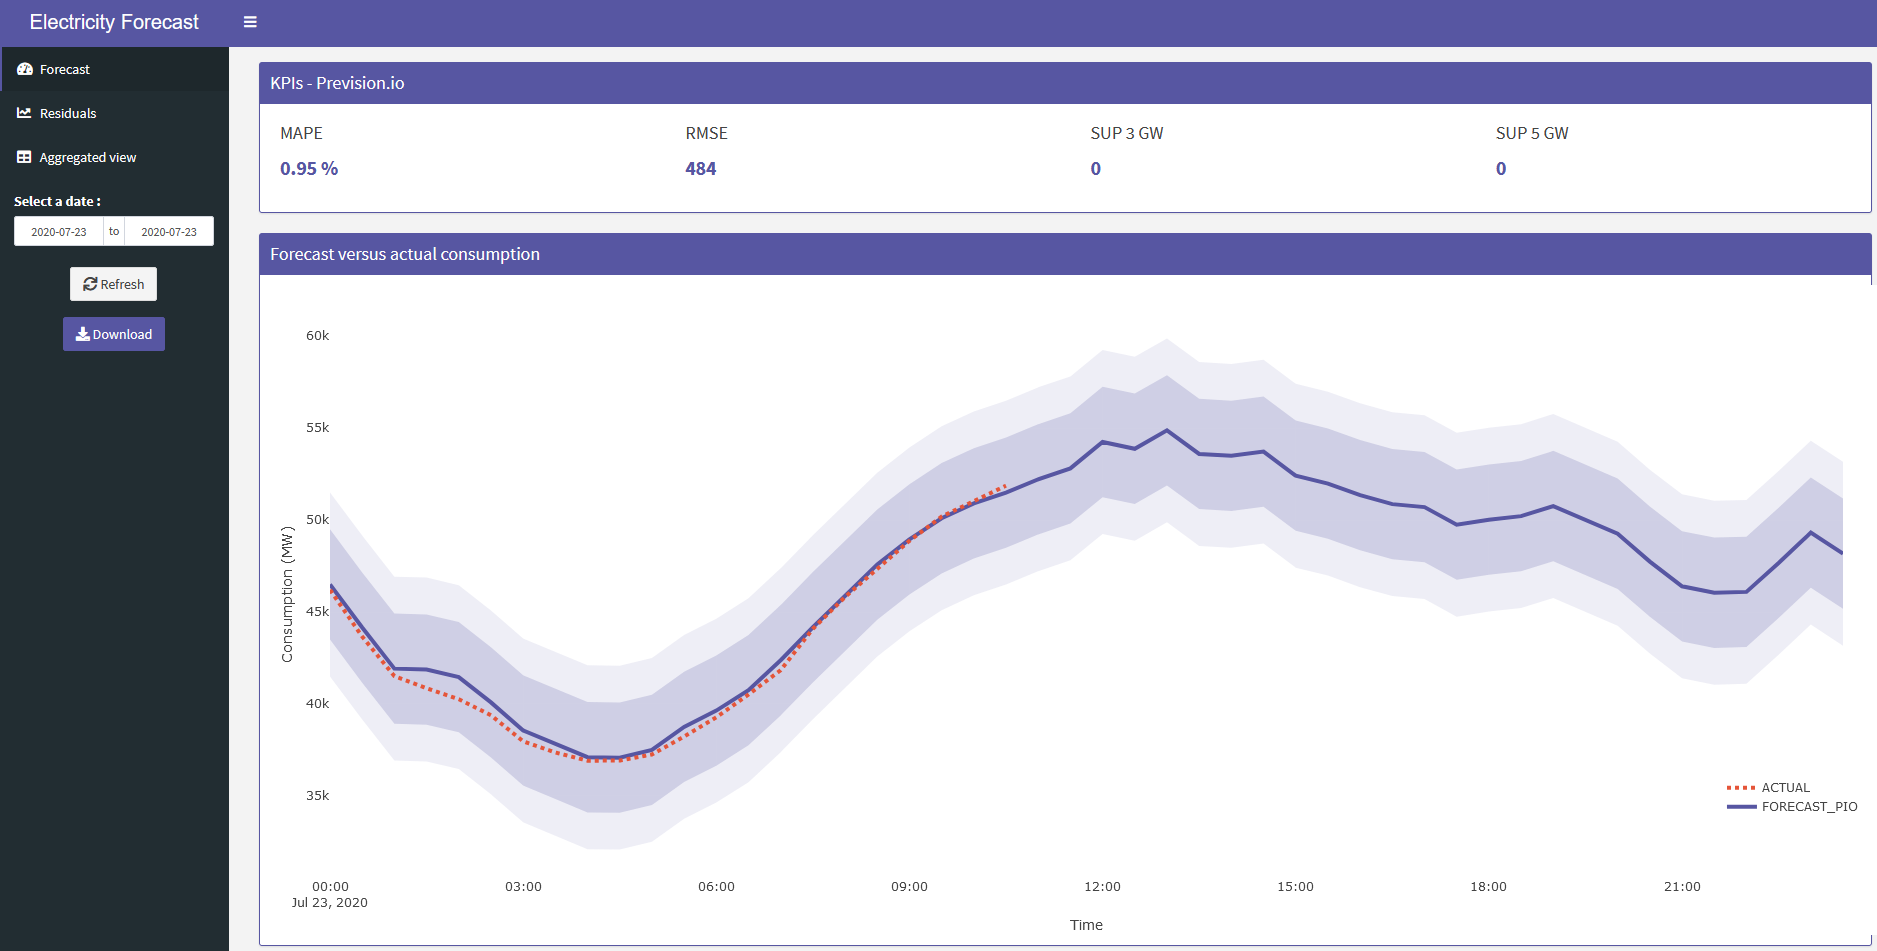
If you access a dashboard, you have access to the interface developed by the studio users. It will therefore be totally personalized. Here are 2 examples of a dashboards:
Deploying new content
To deploy new content in the store, you need to have administrators privileges. If this is the case, the store’s header will look like:

Deploying new usecase
To deploy a new usecase, click on the Usecases part in the header.
By then, you’ll see every usecases already deployed by every store admin:

As you can see, a deployed usecase has:
- A name
- A creation date
- A version number
- A creator
- A card (optionnal)
- A deployed status
- A running status
- A contextual menu (accessible only to your apps), allowing you to remove it
To deploy a new usecase, click on the top right button Deploy a new usecase. You’ll land on the following form:
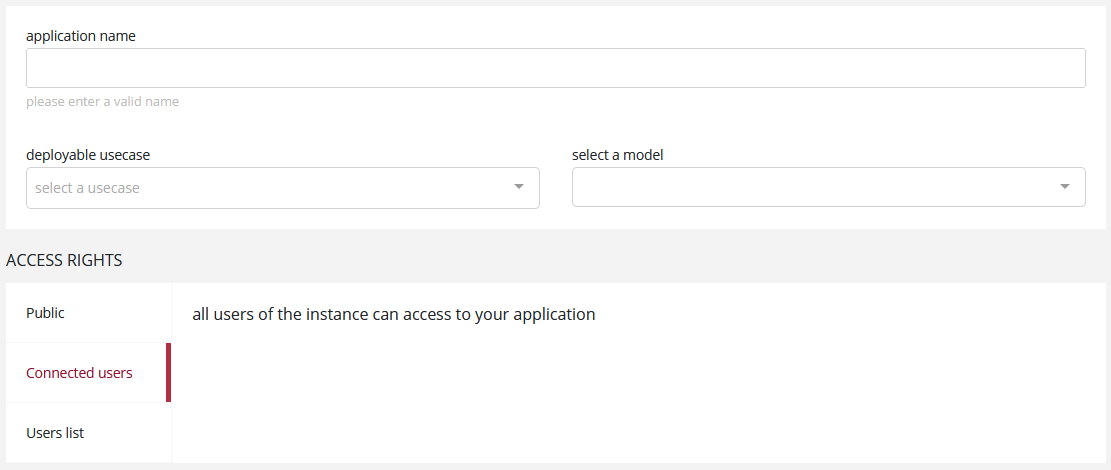
Here, you are asked to provide:
A name for you application
A deployable usecase comming from Prevision.io’s STUDIO
A model related to the selected usecase. By default the « recommanded » one from the STUDIO will be displayed in the combobox but you are free to select the one you want
Rights to give to the application, among:
- Public: Every people with the link to the application will be able to access it
- Connected users: Every users of the instance will be able to access it once logged in
- Users list: Only specified users will be able to access it once logged in
Afterwards, a click on the Deploy button located at the top-right of the screen will start the deploying process.
It will typically take less than 1 minute to deploy a new usecase.
Monitoring a deployed usecase
To monitor a deployed usecase, just click on its name in the listing.
General informations

Here you’ll find general information, such as the deployment date or the owner of the usecase.
Monitoring (datascience)
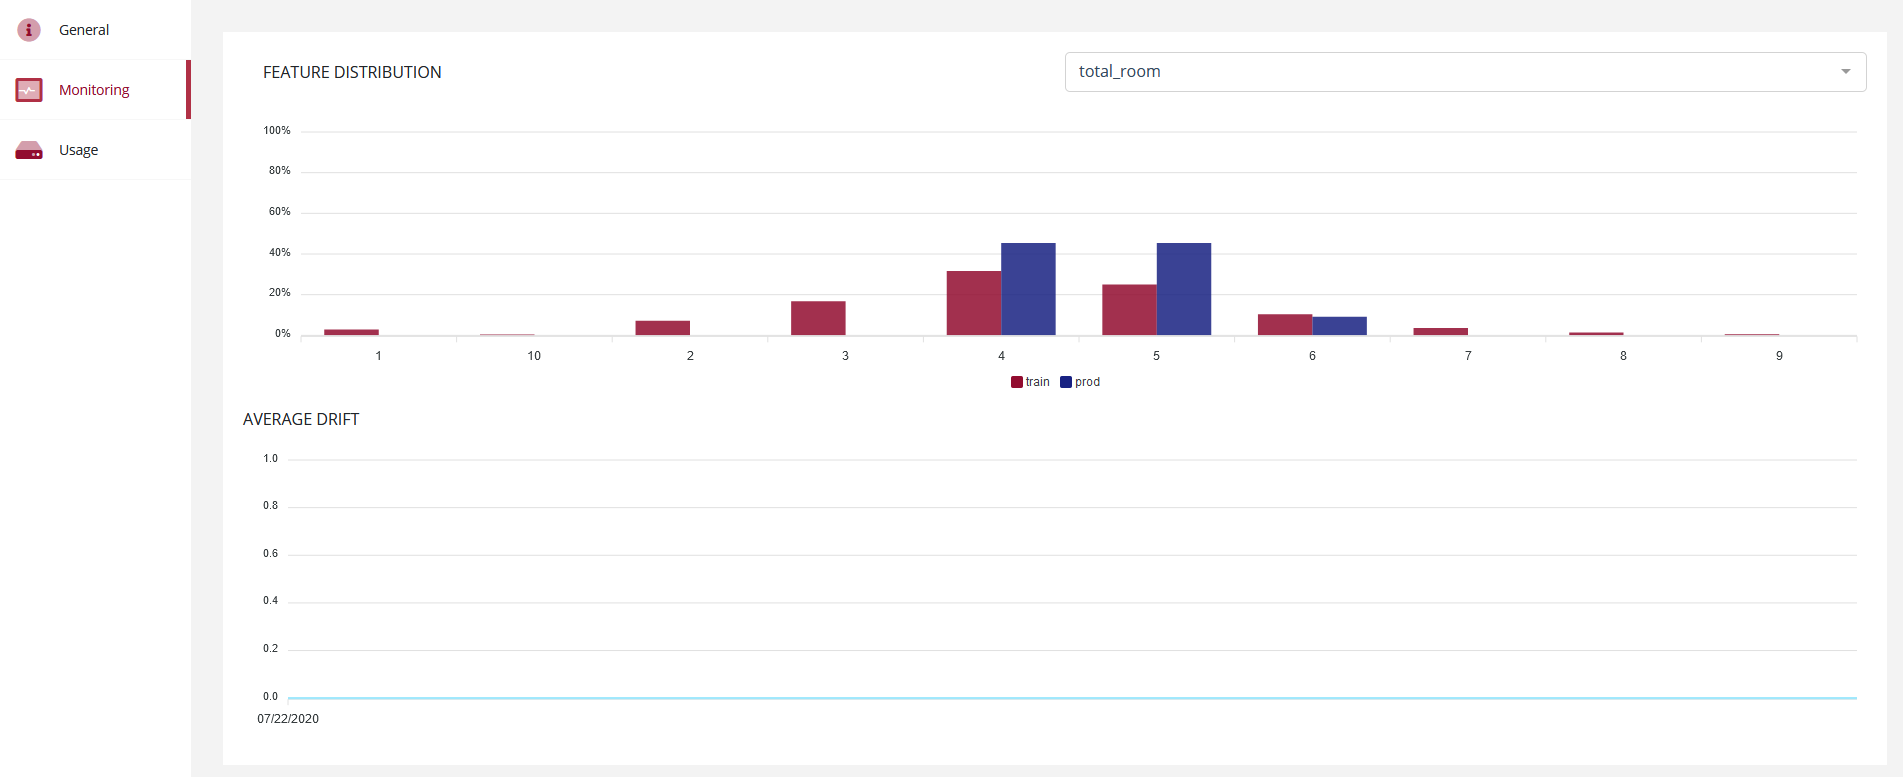
In this screen, you can access distribution of every features and predictions related to the usecase. You can compare distribution of training data versus data fed to the model.
On the bottom part of the screen, you’ll see information about average drift. It will tell you if globally, distribution of features are still aligned between training data and data fed to the model. Please consider retraining your model when the average drift start to raise.
Usage
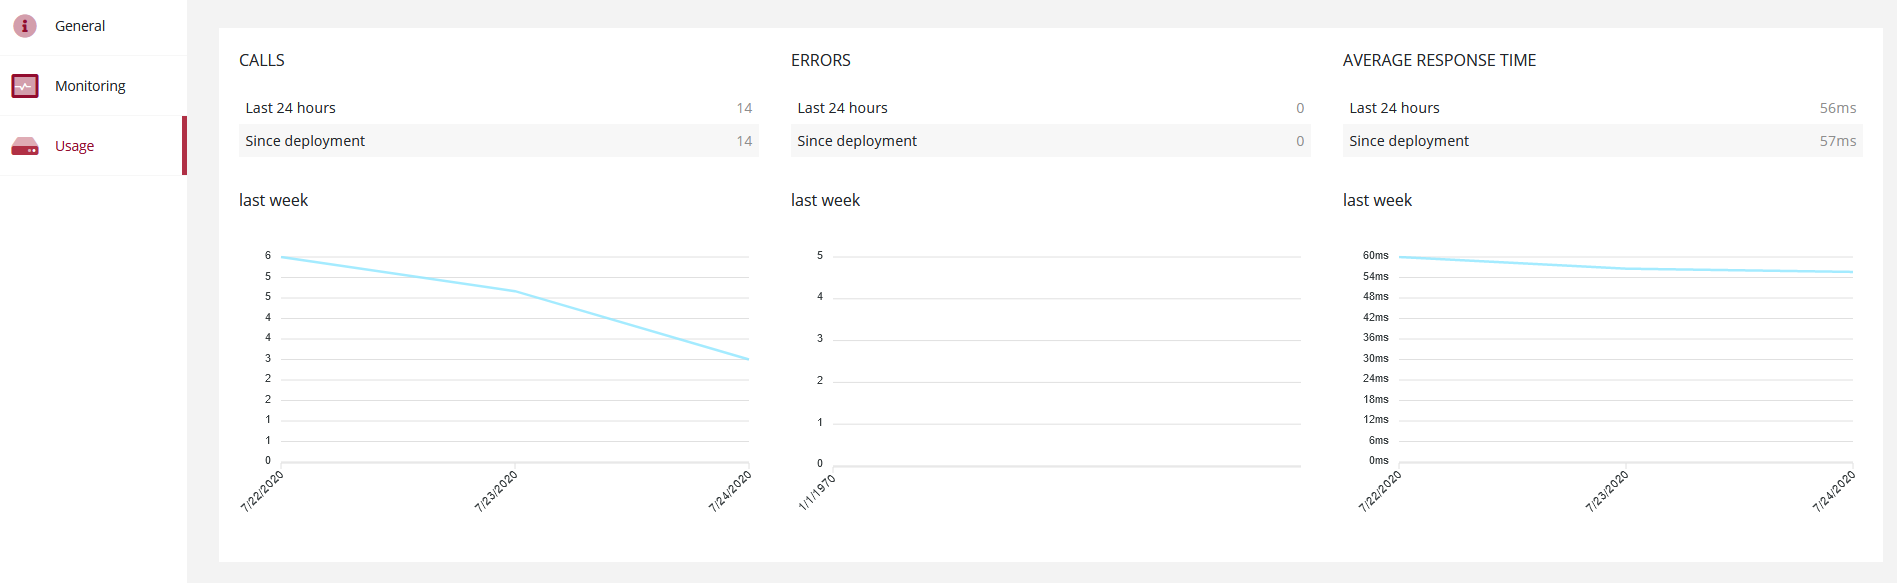
In this screen, you can access information about the usage of the model such as:
- Number of calls since model deployment
- Number of calls for the last 24 hours
- A plot of number of calls last week, grouped by day
- Number of errors since model deployment
- Number of error for the last 24 hours
- A plot of number of errors last week, grouped by day
- Average response time (ms) since model deployment
- Average response time (ms) for the last 24 hours
- A plot of average response time (ms) last week, grouped by day
Deploying a new application
To deploy a new application, click on the Applications part in the header.
By then, you’ll see every application already deployed by every store admin:

To deploy a new application, click on the top right button Deploy a new application.
Deploying a notebook
You can chose to deploy a notebook on the most left part of the screen. If selected, you’ll access the following form:
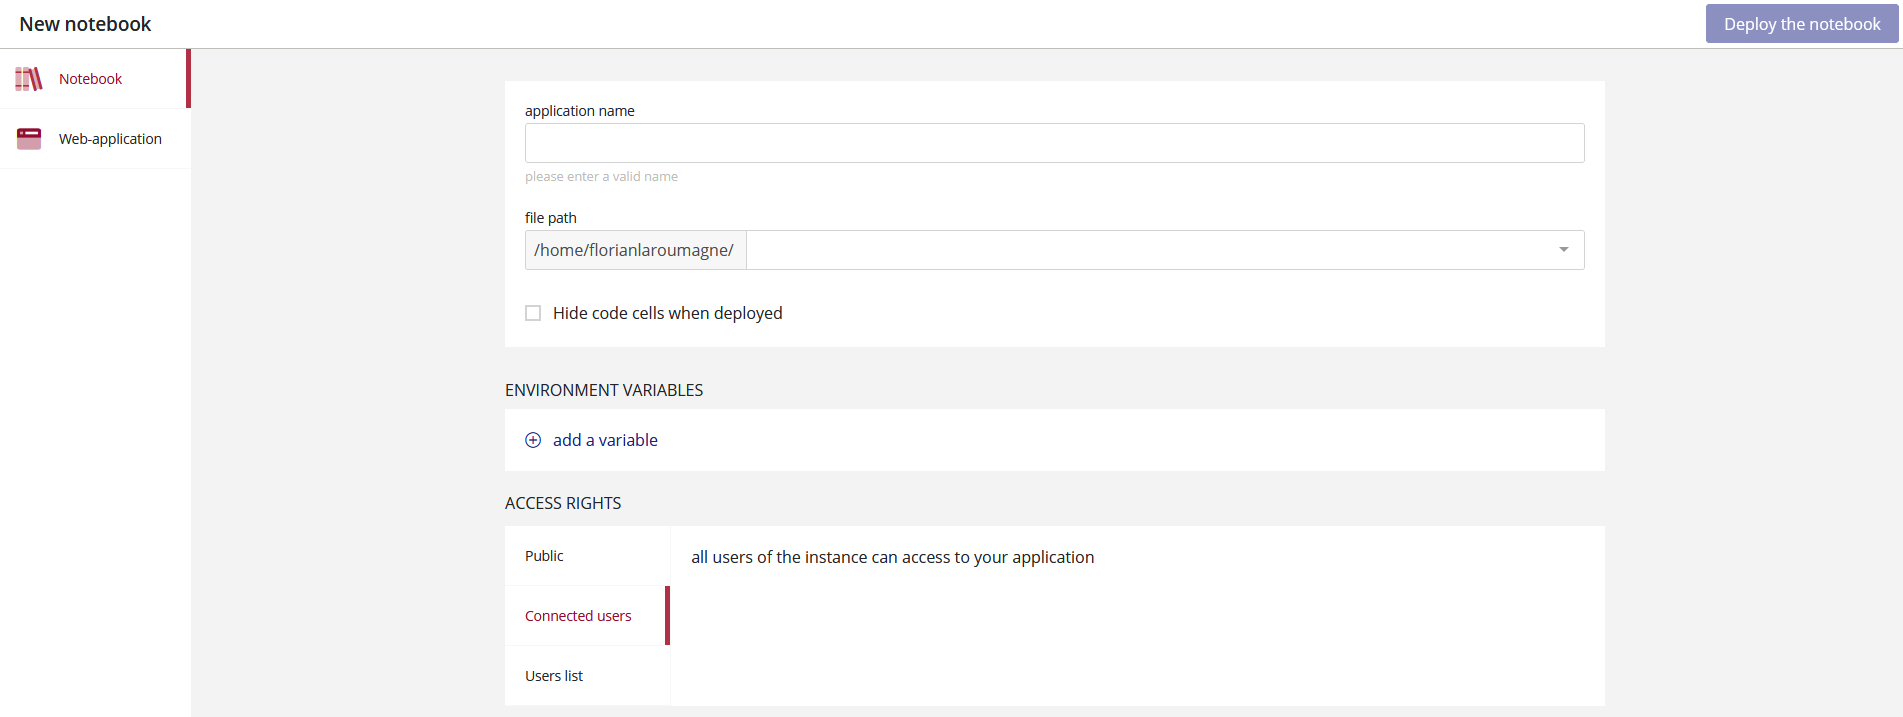
Here, you are asked to provide:
A name for you application
The path to the notebook located in your personnal IDE’s folder (/!only .ipynb are supported for now)
The possibility to hide code cells when deployed (optionnal)
Environnement variables (optionnal)
Rights to give to the application, among:
- Public: Every people with the link to the application will be able to access it
- Connected users: Every users of the instance will be able to access it once logged in
- Users list: Only specified users will be able to access it once logged in
Afterwards, a click on the Deploy the notebook button located at the top-right of the screen will start the deploying process.
It will typically take less than 1 minute to deploy a new notebook.
Deploying a web application
You can chose to deploy a web application on the most left part of the screen. If selected, you’ll access the following form:
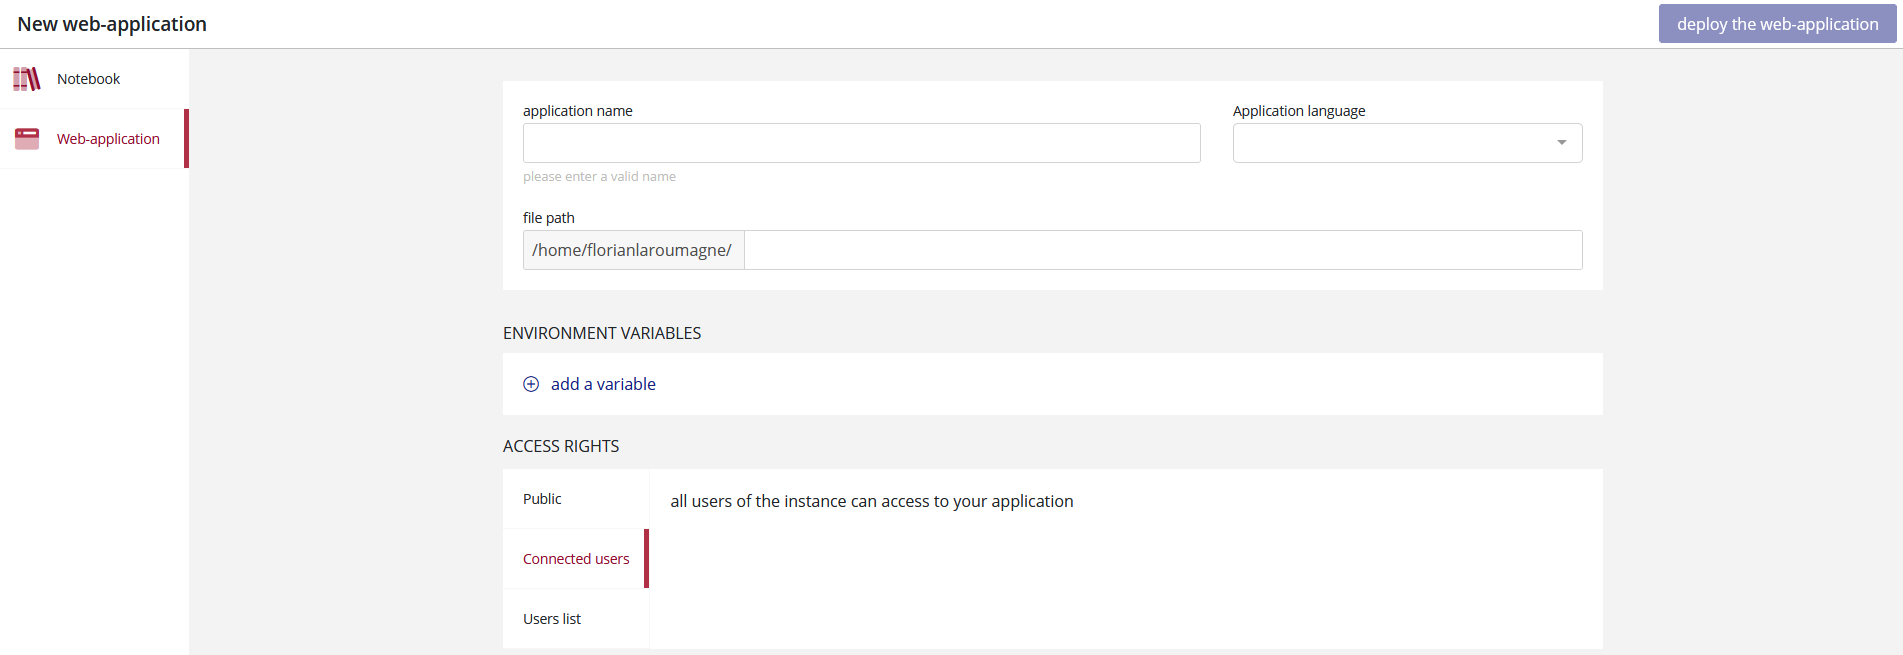
Here, you are asked to provide:
A name for you application
An application language (among R or PYTHON)
The path to the application located in your personnal IDE’s folder
Environnement variables (optionnal)
Rights to give to the application, among:
- Public: Every people with the link to the application will be able to access it
- Connected users: Every users of the instance will be able to access it once logged in
- Users list: Only specified users will be able to access it once logged in
Afterwards, a click on the Deploy the web-application button located at the top-right of the screen will start the deploying process.
It will typically take less than 5 minutes to deploy a new web-application.
Adding a card to your application
If you want that your applications appears on the front page of the store, you need to attach a card to it. To do so click on the Card part in the STORE’s header.
By then, you’ll see every cards already deployed by every store admin:
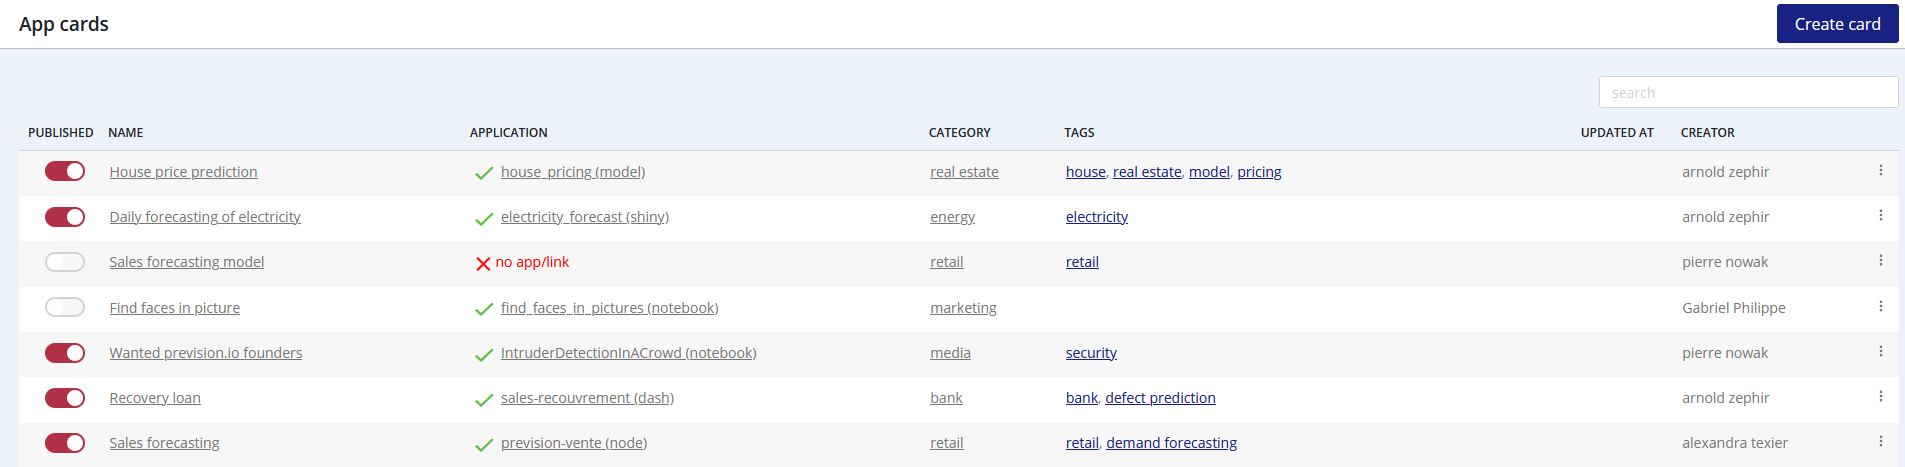
As you can see, a card has:
A published status (yes / no)
A name
An application linked to it (previously deployed)
A category
Tags (optionnal)
An update time
A creator
A contextual menu, allowing you to:
- Edit it
- See it
- Remove it
To create a new card, click on the top right button Create card. You’ll land on the following form:
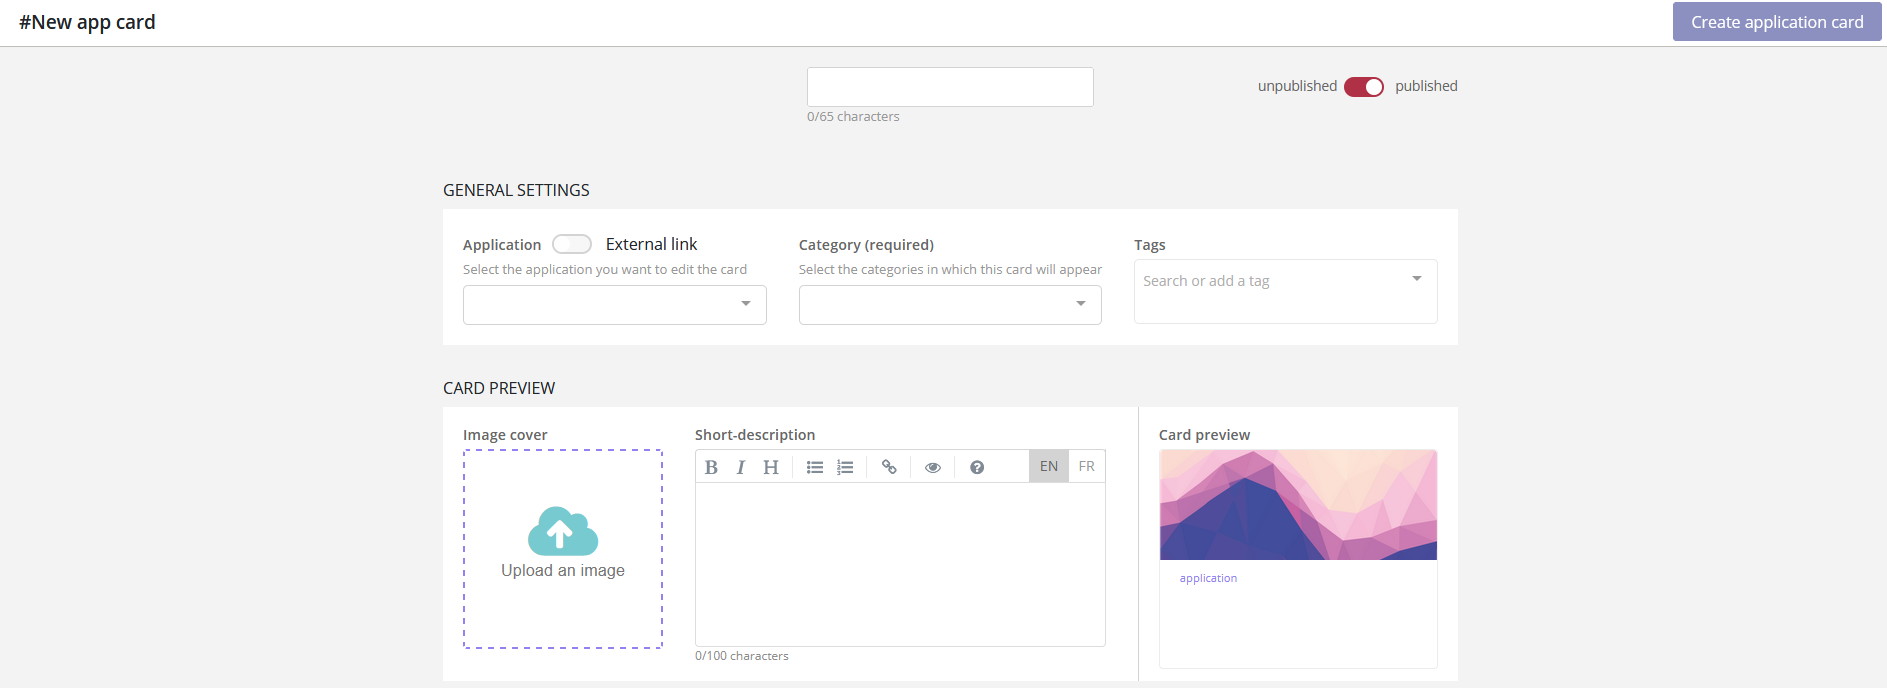
Here, you are asked to provide:
A name for you card
A publshed status (yes / no)
Some settings related to the card, such as:
- The application linked to it (or an external link)
- Its category (required)
- Tags (optionnal)
- Card picture
- Card short description (in english and french)
- Card long description (in english and french)
- « How to use it » description (in english and french)
Afterwards, a click on the Create application card button located at the top-right of the screen will start the deploying process.
It will typically take less than 1 minute to deploy a new card.
Remarks : Since cards have to be linked to an existing Category, you may need to create a new category prior to created a new card. To do so, please head to the Configuration part of the STORE, located in the header.
Configuration
To access the configuration part of the STORE, please head to the Configuration link located in the header.
Here, you can configure:
- Tags
- Cateogires
- Home page of the STORE
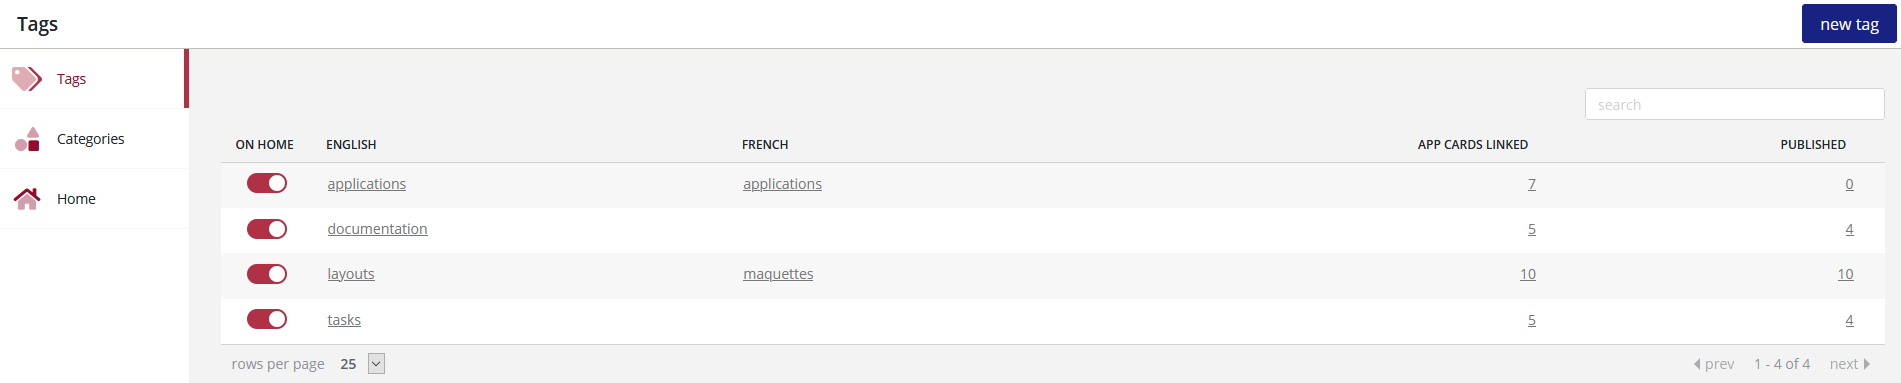
Tags
Tags are meta description of a card. They can be created easily by clicking on the new tag button in the top right of the screen.
You just need to add a tag name in english and in french and publish it.
Categories

Categories are a group of topics that cards can be linked to. They are mandatory so please make sur to create a new category before trying to create a new card.
Just like tags, categories can be created only with and english and french name.
Home

Here you can configure how cards are beeing displayed in the home page of the STORE. You can chose to display (or not) categories and tags and eventually specify their display order.