Text Classification with Prevision.io Data Platform
In this post we will show how in just a few minutes the Prevision.io platform can carry out automated Natural Language Processing and text classification.
It is known that textual data is usually more tricker and harder to process than the linear or categorical features. In fact, the linear features sometimes need to be scaled. Categorical features are scalar straightly encoded, but transforming texts into machine readable format requires a lot of pre-processing and feature engineering. Moreover, there are many other challenges that have to be addressed: how to cover different languages? How is it possible to preserve the semantic relationship between the words’ vocabulary? How to embed the sentence context in the words encoding?
Fortunately, Prevision.io provides an automated processing for the textual features, offering an array of textual transformers that will be automatically operate, while addressing all the challenges that we mentioned: language auto-detection, different types of encoding (metric based encoding, wor2vec encoding, and sentence embedding), as well as different type of models.
We will start by retrieving a kaggle dataset called Real or Not? NLP with Disaster Tweets and show how to launch a text classification “experiment” with Prevision.io, for the first time with the user interface, then using the Prevision.io SDK for “us coders” 🤓. The classification use case consists of predicting whether a given tweet is about a real disaster or not.
Text classification experiment with Prevision.io’s UI
Create a new project or use an existing one
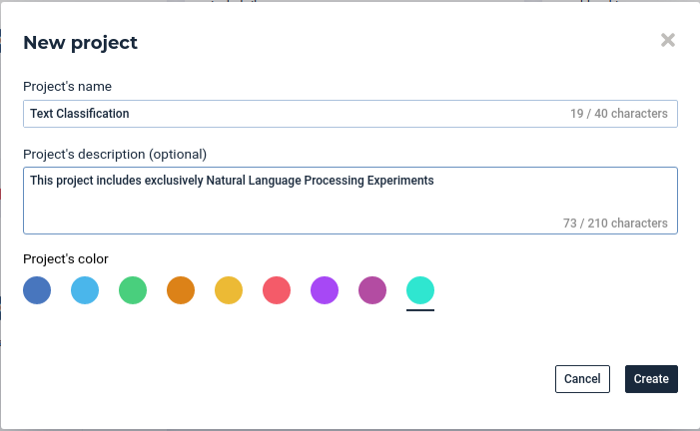
Create a new project
Once you are connected on your Prevision.io instance, click on the button on the top right of the screen of the home page, to create a new project, you can set up the name of your project and add a small description (optional): Example:
Import your dataset
Once the project is created you upload your dataset by clicking on the datasets tab on the left vertical bar then click on Create Dataset button
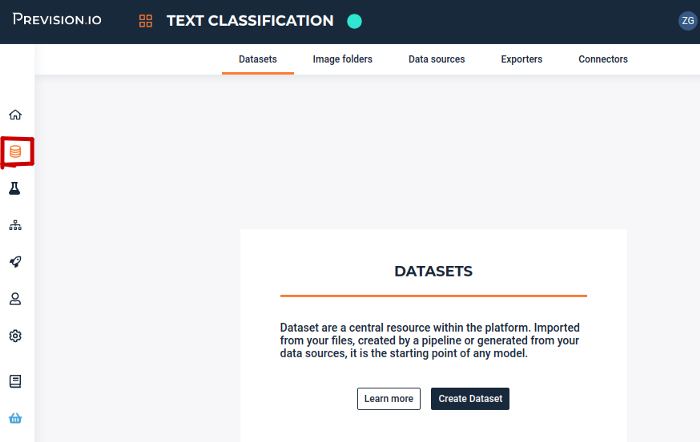
Import your dataset
Then select Import Dataset option and upload you dataset from your machine:
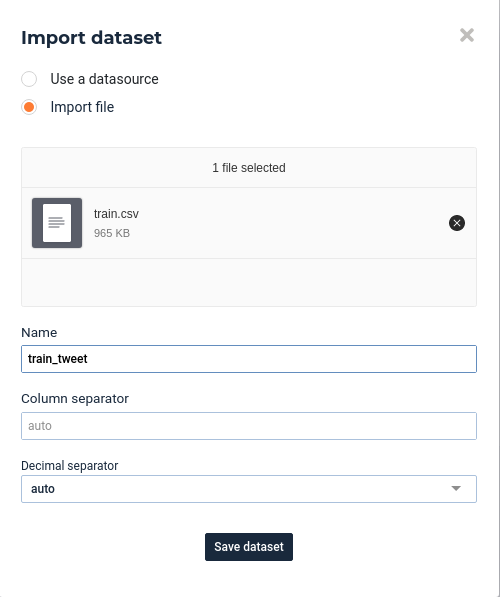
Import csv file
Launch a new Experiment
Once the dataset is loaded you can launch a new experiment by clicking on the experiment tab on the left vertical pallet, then set the following parameters:
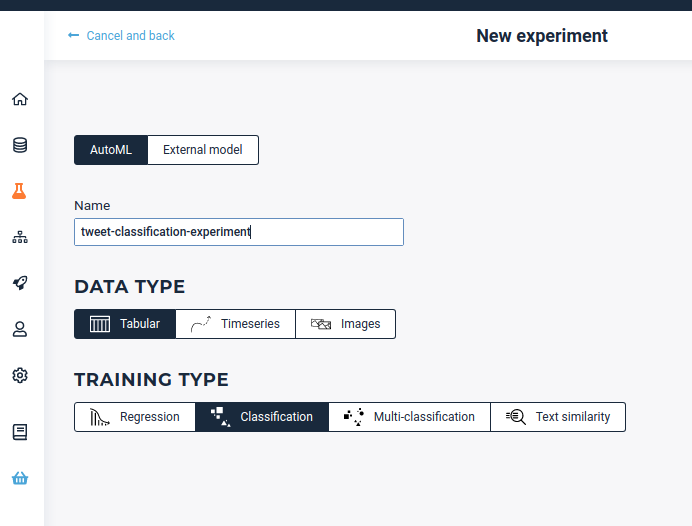
Experiment parameters
Basic setting
For the basic settings, we have to set the essential settings: select the pre-uploaded dataset, add a short description (optional but recommended especially if it is a collaborative project) fix the target (here for a classification experiment it has to be a binary feature which tells whether it is a real disaster or not), fix if there is an ID feature or not (predictions will be applied by id defined by this feature)…
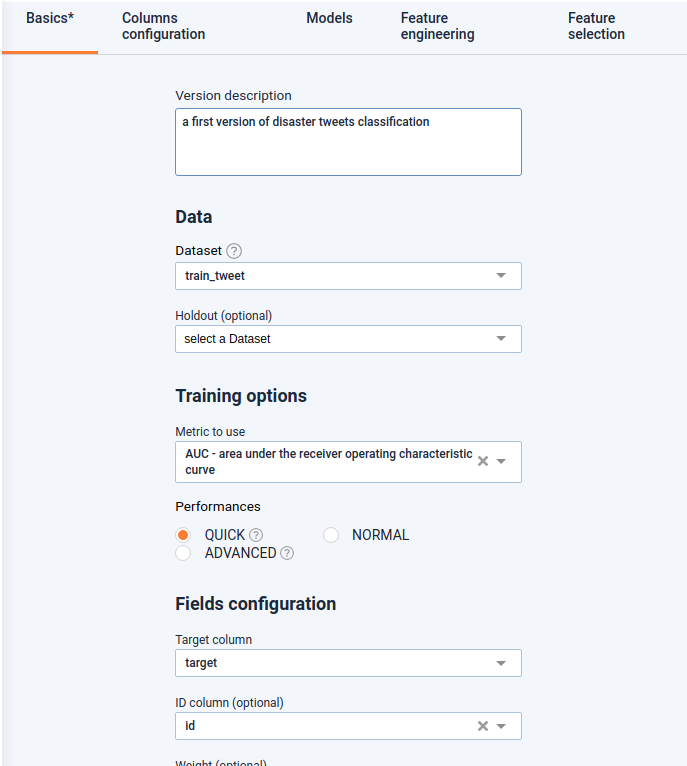
Basic settings
Columns config
In this section, features that were already selected are shaded but you unselect other ones.
Models
In this section you can select the model families that will be experimented. Notice that the Naive Bayes model is available only if we have textual features. In fact it’s based on the popular Bayes’ probability theorem, and is known for creating simple but well performing models, especially in text and document classification. As a first version, we will chose for examples these models:
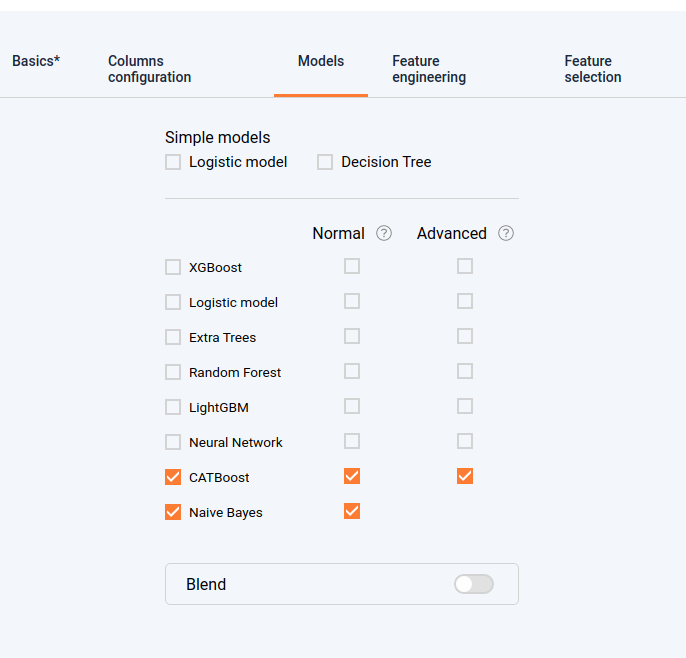
Select models
Feature engineering
In this section we will choose the transformations that will be applied upstream from the modeling. The textual feature engineering supported by the platform are the following:
- Statistical-analysis based transformation (TF-IDF) : words are mapped to numerics using tf-idf. The platform has integrated fast algorithms making it possible to keep all uni-grams and bi-grams and trigrams tf-idf encoding then applies automatically an efficient dimension reduction algorithm allowing to speed up the modeling task
- Word embedding transformation: words are projected to a dense vector space, where semantic distance between words are preserved: Prevision.io trains a word2vec algorithm on the actual input corpus, to generate their corresponding vectors.
- Sentence embedding: Prevision.io has integrated BERT-based transformers, as a pre-trained contextual model, that captures word relationships in a bidirectional way. A BERT transformer makes it possible to generate more efficient vectors than word embedding algorithms, it has a linguistic “representation” of its own. Furthermore we have integrated multiple berts: the basic Bert for english, and the Multilingual Bert for other languages. Each word is represented by a vector that depends on the language and the context, then we use these context-capturing vector representations as input to basic classifiers to carry out an efficient text classification
Once the experiment is launched you can see your models displayed one by one. You can extract all the analysis that you need (feature importances, metrics, graphs) and also you can directly extract the cross validation, and make new predictions.
Text classification experiment with Prevision.io’s SDK
In this section we will see how we can reproduce exactly the same experiment via the SDK. It can be useful if you want to automate this operation, or integrate it as a component in a machine learning pipeline. Please take into account that this code sample is available with `previsionio <https://pypi.org/project/previsionio/`_ version 11.3.1.
All the UI based tasks described in the previous section can be translated to very few code lines as follows.
Connect to the instance
1 2 3 4 5 6 | import previsionio as pio
import pandas as pd
URL = 'https://cloud.prevision.io'
TOKEN = my_token
# initialize client workspace
pio.prevision_client.client.init_client(URL, TOKEN)
|
Create the Prevision.io dataset from a pandas dataframe
1 2 3 4 5 6 7 8 | # use an existing project from id
p = pio.Project.from_id(existing_project_id)
# please make sure to update with your project ID
# create a dataset from a local dataset
## read csv
df = pd.read_csv('tweets_disaster.csv')
## create prevision dataset
train = p.create_dataset('tweets_dataset_from_sdk', dataframe=df)
|
Configure and launch the experiment
The setting below is similar to what we chose with the user interface previously:
1 2 3 4 5 6 7 | # experiment config
col_config = pio.ColumnConfig(target_column=’target’, id_column=’id’)
# config use case profile
experiment_config = pio.TrainingConfig(profile=’quick’,
simple_models=[], normal_models=[‘CB’], advanced_models=[‘CB’], with_blend=False, features=[“text_tfidf”, “text_word2vec”, “text_embedding”, “tenc”, “Counter”])
# launch a new experiment
exp = p.fit_classification(experiment_name=’tweets_classification_sdk’, metric=’auc’, dataset=train, column_config=col_config, training_config=experiment_config)
|
Conclusion
Textual data is one of the most tedious data types to process, that’s why it can be a blessing to have a tool that makes it straightforward and fully automated. Thank you for reading my post until the end 🤗! I hope it was helpful! In the next post I will show you how to use the Prevision.io AutoML platform in a machine learning competition.